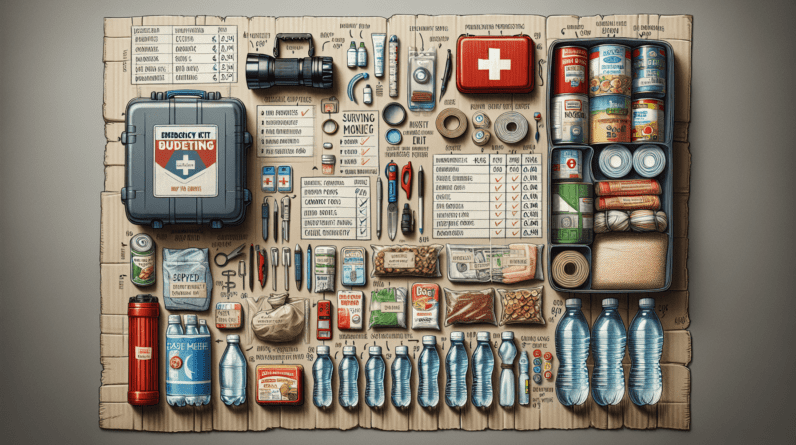
In “Emergency Kit Budgeting: How to Save Money on Preparedness,” you’ll find practical advice to help you build an effective emergency kit without breaking the bank. You’ll discover smart strategies for sourcing affordable supplies, prioritizing essential items, and making the most out of every dollar. This guide provides you with easy-to-follow tips, ensuring that you can feel prepared and confident, even on a tight budget. With just a bit of planning and savvy shopping, you’ll be ready for any unexpected situation that comes your way. Have you ever stopped to think about what you’d do in the event of an emergency? Nobody likes to imagine the worst, but taking a bit of time to prepare can make a huge difference when disaster strikes. When it comes to creating an emergency kit, you might be worried about the cost. Don’t fret! There are plenty of ways to be prepared without breaking the bank. In this article, we’ll guide you through emergency kit budgeting and share tips on how to save money on preparedness.
Table of Contents
Understanding the Importance of an Emergency Kit
Emergencies can happen unexpectedly and in many forms—natural disasters, power outages, or even a sudden evacuation. Having an emergency kit stocked and ready is essential for ensuring your safety and reducing stress during such events.
An emergency kit is a collection of basic items your household may need in the event of an emergency. These items should be easily accessible and provide the necessary supplies to help you endure the initial stages of any disaster until help arrives or the situation stabilizes.
Setting a Budget for Your Emergency Kit
Before you start shopping for your emergency kit, it’s essential to establish a budget. Consider how much you can realistically spend and how many people (and pets) you’re planning to prepare for. A common misconception is that emergency preparedness is costly, but with the right approach, it doesn’t have to be.
Assess Your Needs
Different households have different needs. Assess the number of people you are preparing for and any specific requirements, such as medications, specific dietary needs, or infant supplies. This will help you budget more accurately and avoid overspending on unnecessary items.
Categorize Your Expenses
Categorizing your expenses can help you stay organized and make informed decisions. Here’s an example:
| Category | Budget Allocation ($) | Notes |
|---|---|---|
| Food and Water | 100 | Non-perishable food, bottled water |
| Health and Safety | 50 | First aid supplies, medications |
| Tools and Supplies | 70 | Flashlight, multi-tool, batteries |
| Clothing and Bedding | 40 | Emergency blankets, extra clothes |
| Communication | 30 | Battery-powered radio, extra phone charger |
| Miscellaneous | 30 | Personal hygiene items, documentation |
| Total | 320 |
Tailor this table to better fit your household’s specific needs and financial situation. You can find many items at reasonable prices, especially if you’re willing to shop around and wait for sales.

Saving Money on Emergency Kit Items
Now that you’ve budgeted appropriately, it’s time to start shopping smart. Here’s how you can save money on various essential items for your emergency kit.
Shop Sales and Use Coupons
Sales events such as Black Friday, Cyber Monday, and seasonal sales can be a great opportunity to buy emergency supplies at discounted prices. Also, look for coupons in newspapers or online; many stores offer substantial discounts on survival gear, first aid supplies, and non-perishable foods.
Buy in Bulk
Buying items in bulk can save you money in the long run. Non-perishable foods, bottled water, and personal hygiene items like toothpaste, soap, and toilet paper are usually cheaper when bought in bulk. You can split large quantities with family or neighbors to further reduce costs.
Dollar Stores and Thrift Shops
Dollar stores and thrift shops can be treasure troves for affordable emergency kit items. These stores often carry basic essentials like batteries, flashlights, canned goods, and personal hygiene products. Just be sure to check expiration dates on food and medications.
Utilize Free Resources
Government and nonprofit organizations often provide free educational resources and sometimes even distribute emergency supplies. Websites like Ready.gov offer information on what to include in your emergency kit and how to stay prepared. Local community centers may also host preparedness workshops where you might receive free supplies or advice.
DIY Emergency Kit Items
Not everything in your emergency kit needs to be bought pre-made; some items can be made at home, often at a fraction of the cost.
DIY First Aid Kit
Creating your own first aid kit can be more cost-effective than buying one pre-assembled. Here’s a list of items you can compile:
- Adhesive bandages (various sizes)
- Sterile gauze pads and adhesive tape
- Antiseptic wipes or solution
- Tweezers and scissors
- Over-the-counter pain relievers (ibuprofen, aspirin)
- Allergy medications (antihistamines)
- Digital thermometer
- First aid manual
Homemade Emergency Food Packs
Instead of buying expensive pre-packaged emergency food, you can create your own meal packs with affordable non-perishable items. Consider the following:
- Instant noodles or pasta
- Canned beans and vegetables
- Peanut butter or other nut butters
- Dried fruits and nuts
- Granola bars or protein bars
DIY Water Filtration
While it’s important to store bottled water, it’s also wise to have a water filtration or purification method in your emergency kit. You can create a simple DIY water filter using a plastic bottle, sand, charcoal, and gravel. Instructions for making such filters are widely available online.

Prioritizing Your Purchases
When you’re working with a tight budget, it’s crucial to prioritize your purchases. Here’s a way to prioritize the items you need for your emergency kit:
Must-Have Essentials
Focus on the following essentials first:
- Water: Plan for one gallon per person per day for at least three days.
- Food: Non-perishable items that can last at least three days.
- First Aid Supplies: Basic medical supplies and any personal medications.
- Shelter and Warmth: Emergency blankets, tarps, or tents.
- Communication: A battery-powered or crank radio to stay updated on emergency news.
Nice-to-Have Additions
Once the essentials are covered, consider adding the following:
- Extra clothing and sturdy shoes
- Tools like a multi-tool, duct tape, and rope
- Personal hygiene supplies such as soap, toothpaste, and baby wipes
- Manual can opener for canned foods
- Books, games, or other items to pass the time
Regular Maintenance and Updates
An emergency kit isn’t a one-and-done project. Regular maintenance and updates are necessary to ensure everything is in good condition and up-to-date.
Check Expiry Dates
Set a reminder to check the expiration dates of food, water, and medications at least once a year. Rotate out expired items and replace them with fresh supplies.
Seasonal Updates
Update your kit according to the season. In winter, include additional blankets and warm clothing. In summer, add items like sunscreen and insect repellent.
Updating Personal Information
Ensure that copies of important documents are current and stored in waterproof containers. This can include identification, medical records, and insurance papers.

Involving Family and Community
Preparedness can be a family or community effort. Involving others can help spread the cost and make the process more manageable.
Family Preparedness Plan
Discuss emergency situations with your family and involve everyone in the preparedness process. Assign responsibilities, create an emergency communication plan, and practice emergency drills.
Community Resources
Join local preparedness groups or community organizations. Sometimes these groups offer resources, training, and discounted supplies. Neighbors can also team up to buy items in bulk or share tips and resources.
Final Thoughts: Start Small and Grow
Starting an emergency kit from scratch can feel overwhelming, but it’s important to remember that it doesn’t have to be completed all at once. Begin with the essentials and slowly build up your kit over time, keeping an eye out for sales and discounts.
By adopting a budget-conscious approach and making informed decisions, you can create a reliable emergency kit without straining your finances. Taking these steps not only ensures your safety during emergencies but also provides peace of mind knowing you are well-prepared.
Stay safe and be prepared without breaking the bank. You’ve got this!


